Organizing Files in Eclipse
There will be many opportunities to create projects and programs and as time goes by, there will be some additional components such as accessing text files and other actions. To make sure the environment is prepared for work and for future operations, it is important to follow a standard structure for the projects and files.
As shown on the previous page, the Eclipse IDE displays the following before any projects have been created.
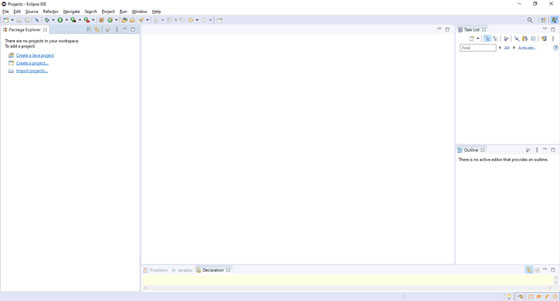
The first step for all actions will be the same. Start by selecting the drop-down arrow to the right of the New file icon, shown here.
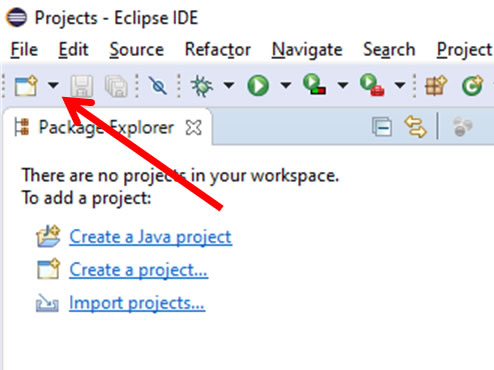
The drop down menu will appear as follows.
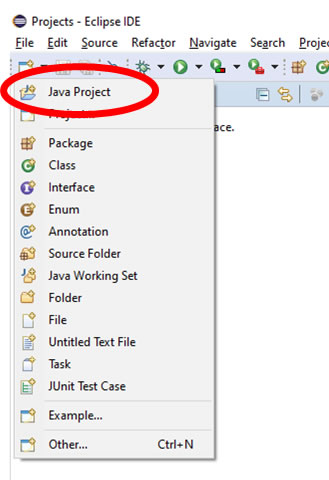
Select the Java Project item, and the following is displayed.
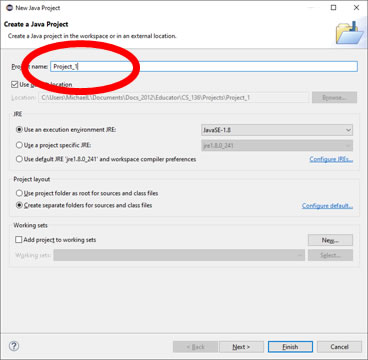
Once the project name has been entered, select the Finish button, and the following will be displayed.
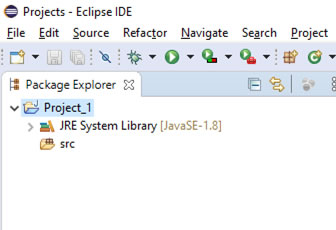
If it is not already done, select the down chevron on the left side of the name Project_1 to see the contents. Note the src directory. Select (click on) the src icon as shown.
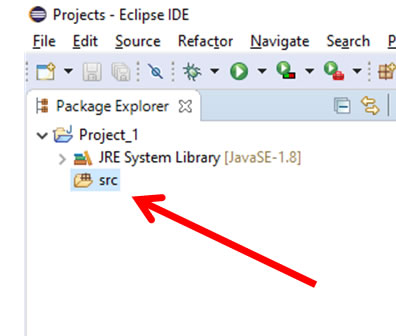
Now go back up to the drop down arrow next to the New icon and find the package item as shown.
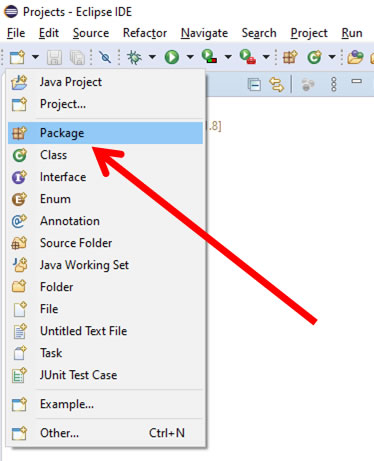
The package assignment box is displayed as follows.
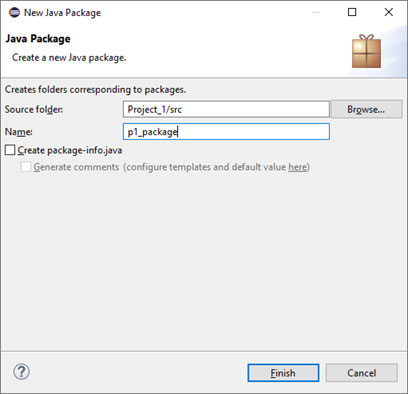
Fill in the name p1_package. Note the Source folder above. Project_1 will have p1_package, Project_2 will have p2_package, etc. as more projects are created. Select Finish when the name has been entered. The following will be displayed.
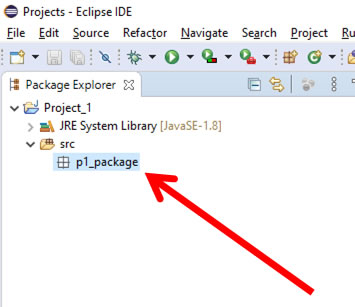
The p1_package name should be selected (i.e., colored). If it is not, select (click on) it so it shows being selected. Now go back up to the drop down arrow beside the New icon, and select the Class item as shown.
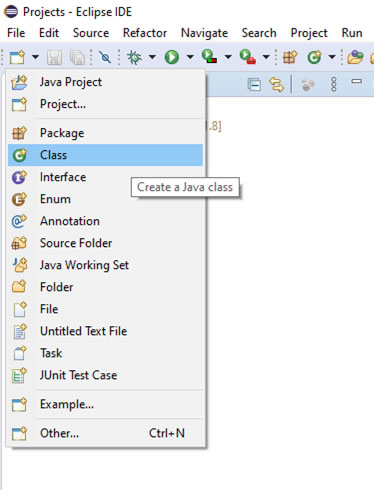
Enter the class name in the text box as shown.
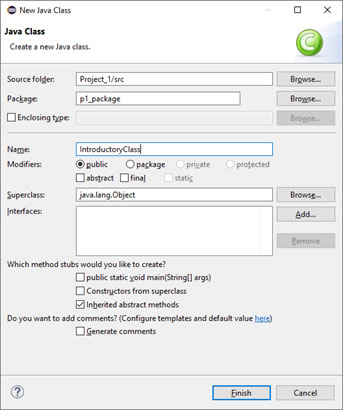
Again, since the p1_package was selected, the Source Folder and Package information are correct, and the IntroductoryClass name is entered in the Name box. In most cases, there is nothing else to do in this window, so select Finish to continue. The directory tree is displayed below.
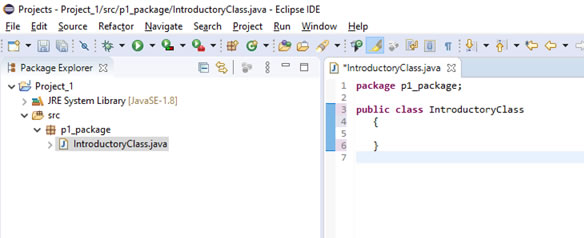
Note that the class name IntroductoryClass must also be the name of the class file. An example of the organization of an Eclipse with several projects is shown below.
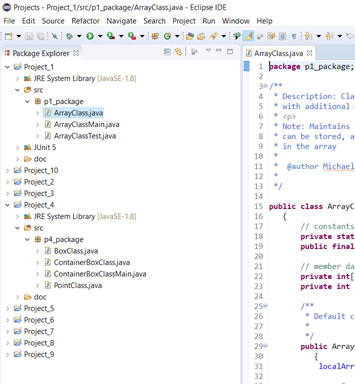
A couple of projects have been opened to display the format. All projects must use this form for consistency and structure.
Configuring the Editor
The one other thing that must implemented in Eclipse, and pretty much any other editor is to set up the text editor properties. There are rules for creating structured programming that must be followed, and Eclipse can help support the quality of your operations.
The following video walks through how to set up Eclipse so that the appropriately structured and organized format is implemented. All the videos in this reference are meant to be viewed as students work. The video can be played for a little bit, and then be paused while the student conducts appropriate actions, and then the video can be continued. This is how to effectively use this reference and the associated videos. The video used to configure the editor settings is found here.